
macOS PLIST for Google Chrome with Intune
Customers often seek for customized browser settings for macOS and Windows 10/11 from Microsoft Intune. The most frequent browsers used by their end-users are either Microsoft Edge or Google Chrome.
We all come across numerous blogs which literally spoon-feed the configuration profile settings for Microsoft Edge or Google Chrome for Windows platform. But hey! What about macOS ?

Create macOS Preference file (PLIST) for Google Chrome with Microsoft Intune with Salona aka #Intunsiastic
Over my past few experiences with customers from the EMEA region and interactions with Microsoft’s MVPs at the MEM Summit 2023, Paris, I have come across this question several times. Hey Salona aka #Intunesiastic! what device configuration settings do you recommend for macOS with Microsoft Intune? Many of us are curious and interested to know about macOS!
As long as Microsoft Edge browser settings for macOS are concerend, the Settings Catalog is the go-to solution .
The Settings Catalog Configuration Profile settings is a relief for IT Admins where you just need to type the correct keyword. It ensures that everything is configured correctly with one click. Moreover, the Intune admins are relieved from the brainstorming of the macOS device settings they need for their employees.
Well this blogpost today will exactly guide you step-wise browser settings for Google Chrome browser for macOS using Microsoft Intune.
Unfortunately, for Google Chrome settings for macOS there are none in Settings Catalog . This is the reason I consider the Preference File or P.list method as my savior.
Google Chrome Browser Settings for macOS using PLIST with Microsoft Intune
Preference files (.plist files)
- Format: Plist files can be in XML format or a binary format. They can be edited with a text editor, property list editor, or with command-line tools like defaults. I am using Notepad++
- File Locations: Intune managed plists: /Library/Managed Preferences
- PLIST files are generally modified to make customized Application settings (Google Chrome, Adobe etc.)
P.list is an xml file that I shall upload to Intune Template Configuration Profile. In short, the PLAN is as below:
- To get an existing P.list file (from somwehere-Shhh! I will tell you that, too!)
- Customize the settings in the file as per my requirements
- Save it as an ‘.xml’ format
- Upload to Microsoft Intune and assign it to the macOS device under test.
The detailed steps are explained here with snapshots:
- Get an existing P.list file. – The Chrome Browser for the enterprise bundle includes a sample property list (.plist) file that you can customize to define policy settings. You then convert this file to a configuration profile that can be deployed to your user’s devices. So first, download the Chrome Browser bundle for Windows zip file.
I would especially like to mention my side of story here. After all, I am a human and could also get mistaken 😉 The process from here is pretty easy if you know it or spot it correctly. But honestly, it took me quite a few hours to spot the Configuration Folder! To Save you from this puzzle and misleading information, I am sharing below snapshots:
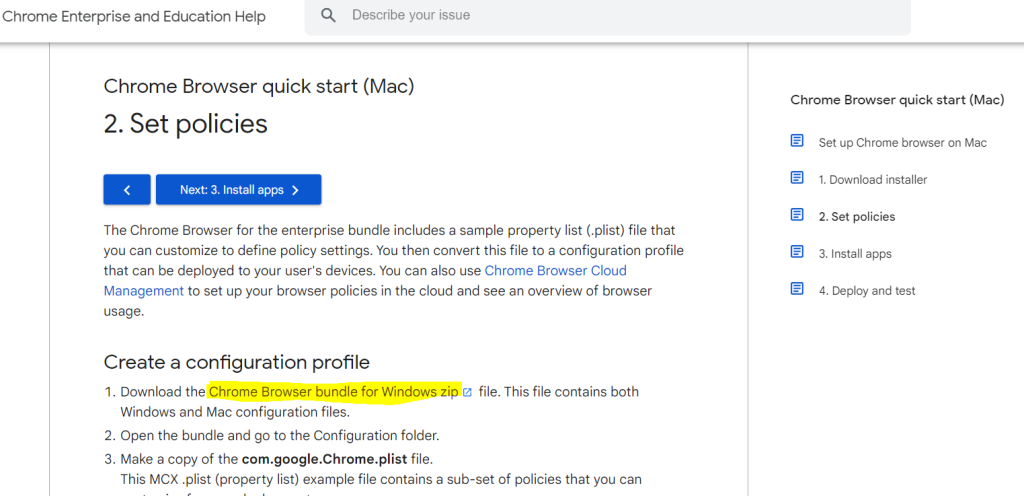
Fig i)
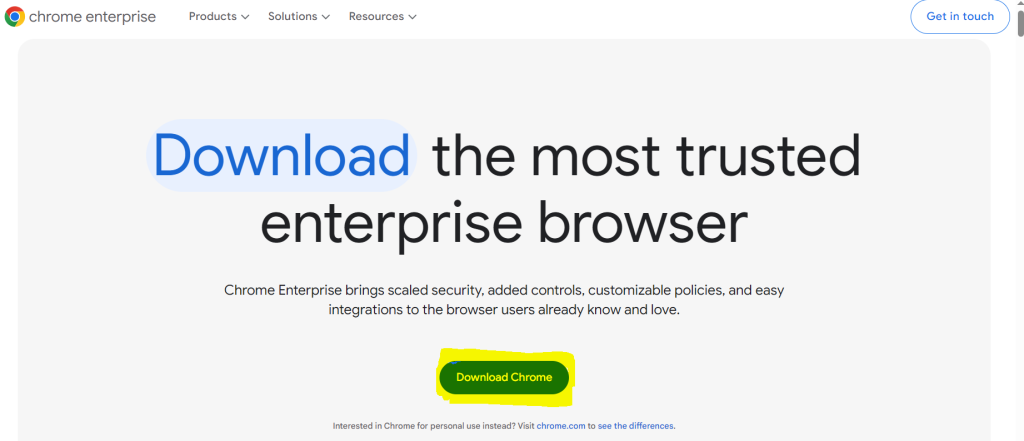
Fig ii)

Fig iii)
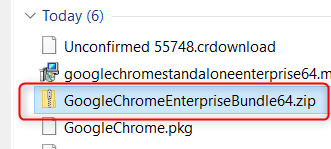
Fig iv)

Fig v)
The first look of the downloaded original file is somwewhat like this:

Fig vi) Original PLIST File For Google Chrome
2. Now let’s craft out our .plist file in the correct XML format, which is acceptable by Microsoft Intune. The file should only have key value pairs and shouldn’t be wrapped in <dict>, <plist> or <xml> tags. After removing the <dict>, <plist> or <xml> tags and adding my own customizations, the xml file is like the snapshot, which we are going to upload to the Intune Preference File Template Configuration Profile.
Additionally, the link below shall help you to customize the settings with the admnistrative template settings:
Browser sign in settings (admx.help)
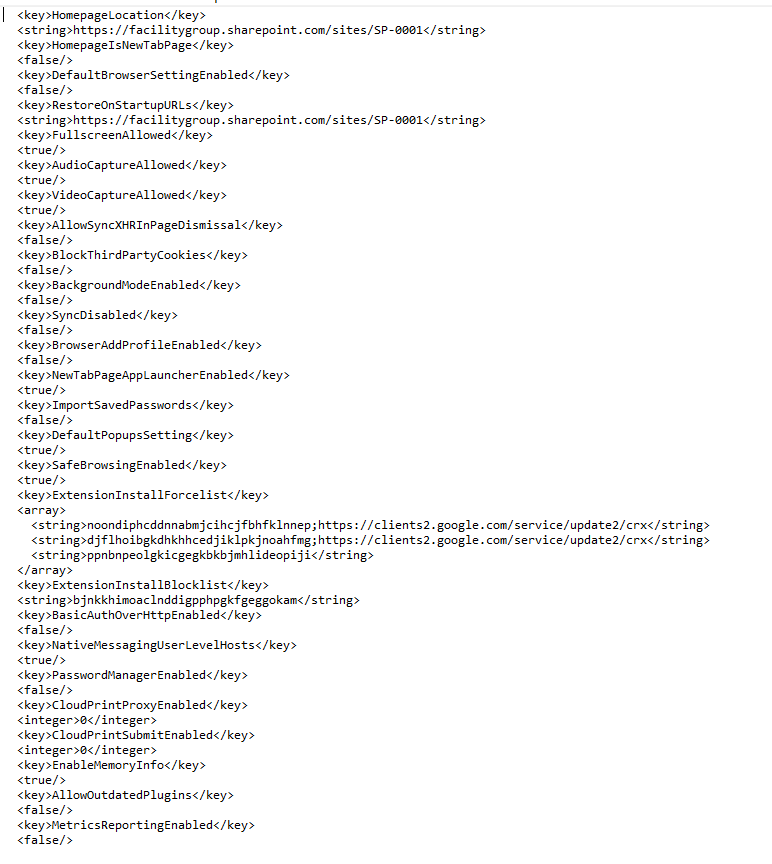
Fig vii) Customized Google Chrome Browser Settings without tagging.
3. Once the file is ready, the next step is to go to the Microsoft Intune portal, create a Device Configuration Template Profile for Preference File, upload the file and assign to the Device Group. The snapshots below explain the same:
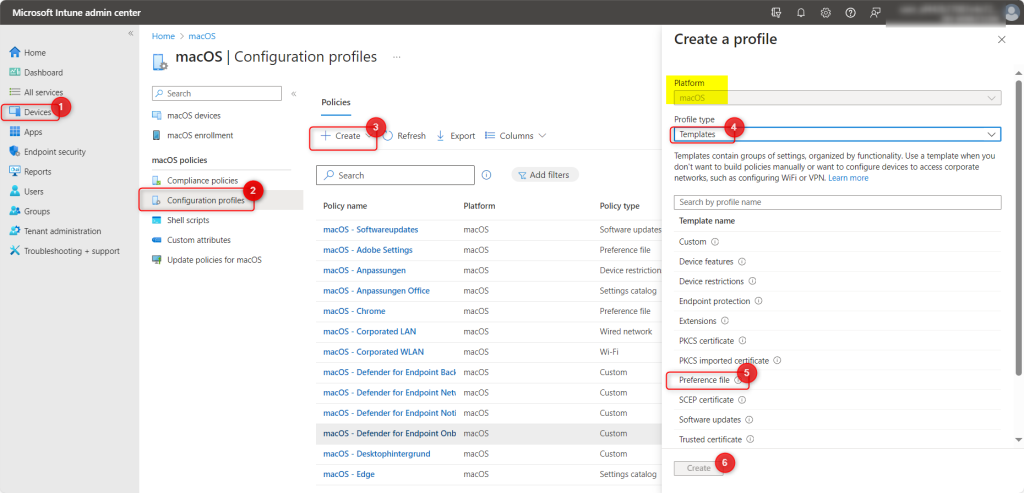
Fig viii) Creation of Device Config Template Profile-Preference File
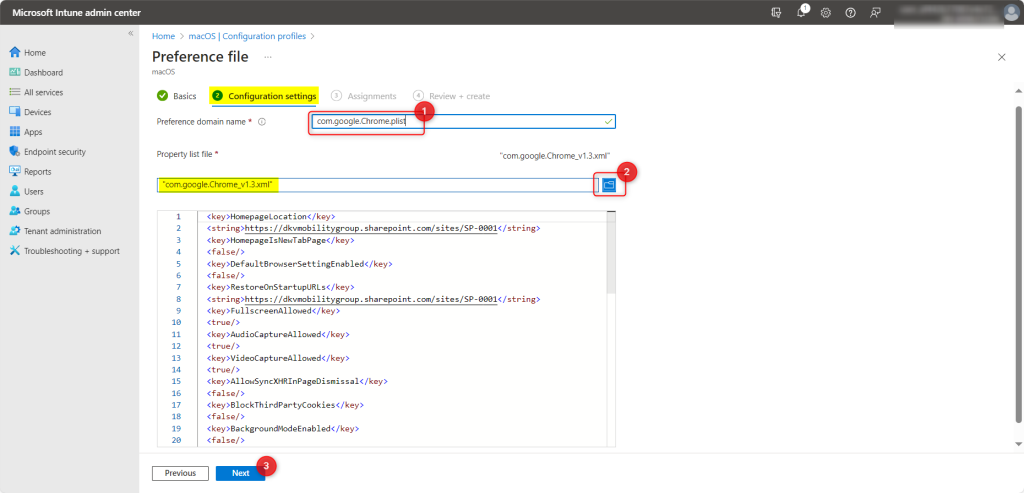
Fig ix) Upload Customized Preference list xml File

Fig x) Device Configuration Profile created.

Fig xi) Profile deployed successfully
Hence, I hope that today I have been able to give you a step-wise approach about creating the PLIST Files for Google Chrome Browser settings with Microsoft Intune.
Moreover, I strongly believe that – ‘The fastest way to learn and retain a skill is, to teach it!‘ I recommend to stay tuned with me for such new topics. This is just the beginning.🌟
Author: Salona Sahni Kapoor aka Intunesiastic
cubic solutions GmbH